10 of South Africa’s pro photographers and top Instagrammers share photography tips on how to take the best travel photos possible. Because hello holiday!
Photographer Elisha Bax Dibakoane @dudefromsa on what makes a good photograph
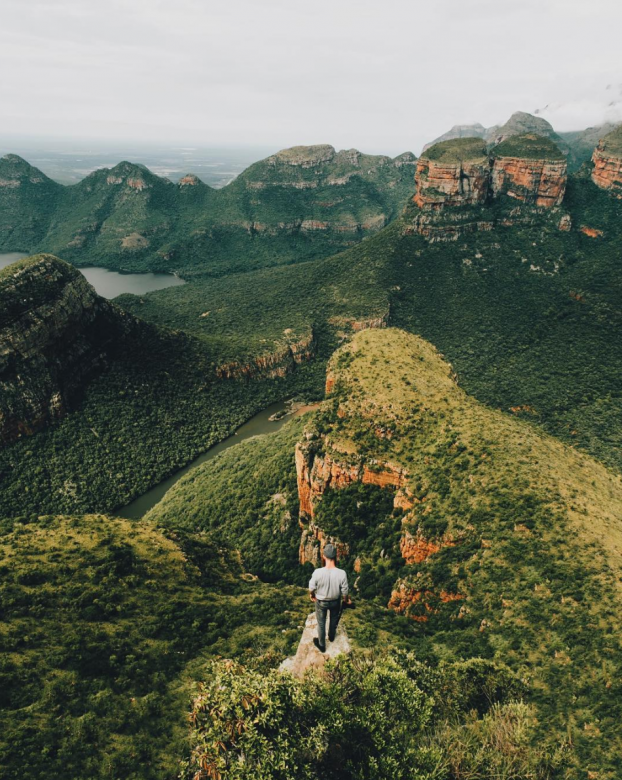
Location: most breathtaking pictures are not stumbled upon, but are planned. The best picture is the one that you imagine before you execute. Take the time to do location scouting.
Perspective: You will see millions of pictures of the same location on Instagram, so find an interesting angle to frame your unique picture. Consider if you need a low, level or high angle. Decide on the story you want to tell and the emotions you want to evoke.
Technique: I prefer layering the foreground, middle and background. Don’t center the subject unless it’s necessary and use the rule of thirds. Leading lines add depth to a picture.
Settings: manual mode, ISO at 100, aperture 7.1 or 8 (most lenses are sharp at this aperture) and select the shutter speed depending on light (try experimenting with 1/500). Use auto white balance or your built-in light meter to get the correct exposure. For travel pictures keep the frame on everything in focus.
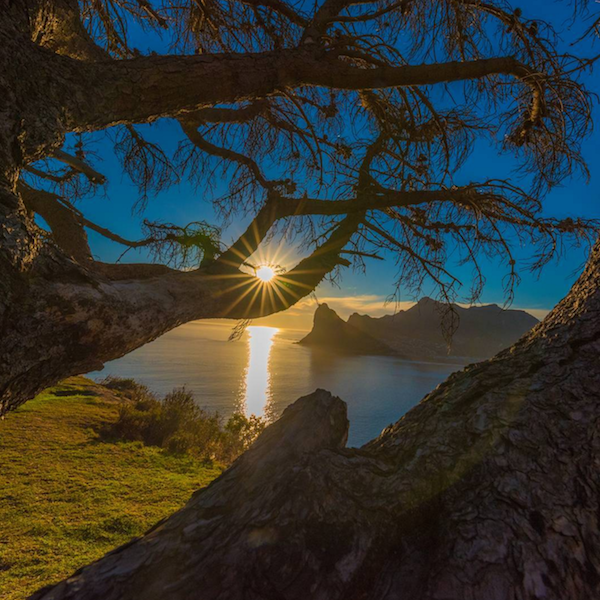
Image courtesy of @dudefromsa via Instagram
Landscape photographer Liesel Kershoff @LieselKershoff on how to take landscape photographs
Photographers are visual creatures. We look, feel and touch with our eyes and the wish to capture that feeling is what drives us to take photographs. For that reason landscape photographers prefer to capture photos with wide-angle lenses. But a wide-angle photograph can often seem flat or one dimensional, unless it’s printed 2 metres wide where all the details come to life.
For this reason my favourite lens is my 70-200mm zoom lens. This lens forces me to look deeper into a landscape, it brings emotions and depth to a landscape, which a wide angle can never convey. It tells a different story to the wide angle photograph. Next time you see a beautiful scene, look closer, deeper and whip out that big zoom lens you were saving for your safari.
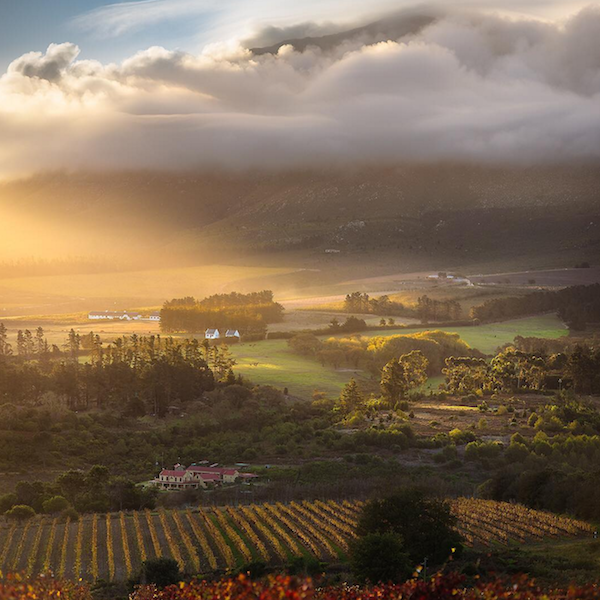
Image courtesy of @lieselkershoff via Instagram
Urban geography lecturer @jayjay_gregory on how to photograph architecture
When taking photographs of buildings, it’s always important for me to portray the broader context of where the building is situated and how it interacts with the urban landscape. I always try to capture the street life and people in my photographs of buildings. When photographing buildings it is also important to capture symmetry or leading lines, as it will make the image much more striking. To add a touch of drama, you can shoot or edit the image in black and white. This will naturally bring out the contrast and architectural details of the building.
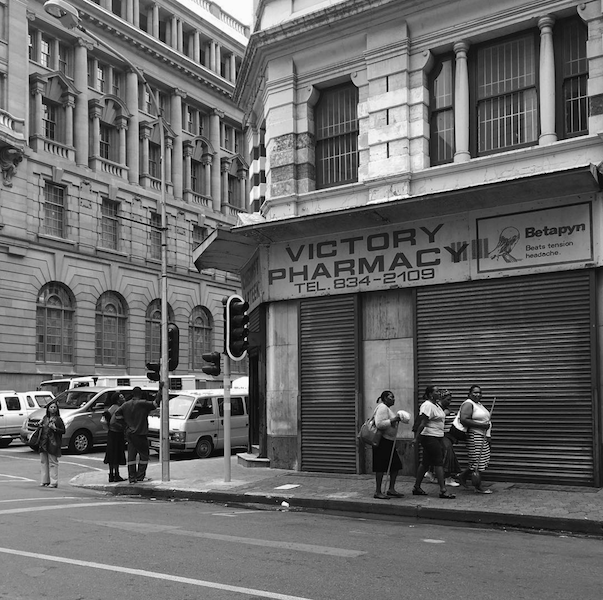
Image courtesy of @jayjay_gregory via Instagram
Travel Blogger Heather Mason @2summers on taking portraits
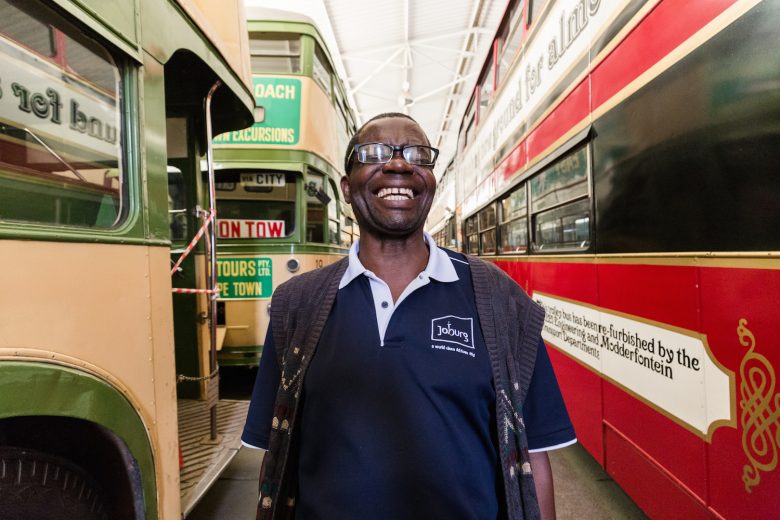
Image courtesy of @2summers via Instagram
When photographing people, my favourite strategy is to spend a few minutes building a relationship with the person before snapping any pictures. Start up a chat, ask the person a few questions about what they do, then ask for permission to take a photo. Find a good background – something that tells a story about the surroundings. Shoot a couple of test shots to make sure you have your settings right, then say something to make the person laugh. My favourite line is: “Say Budweiser!” This is almost guaranteed to bring on a big smile. Snap a few frames in quick succession; one of them is bound to be good.
Photographer Andile @buka_andile on what makes a compelling black and white photograph

Image courtesy of @buka_andile via Instagram
Shooting black and white allows one to look at the image in its entirety. You are not drawn into it by colours and I feel like there are fewer distractions within black and white photographs. I like playing with shadows, light and having hard contrasts in my images. When it comes to my subjects and what are photograph on a daily basis, I gravitate towards portraits. People’s gaze, gesture and the way they position their hands. I’m interested in those lines, details and what it has revealed to me.
Travel, food and culture journalist Ishay Govender-Ypma @ishaygovender on photographing food
There are two types of shots I share – the styled photo (very rarely) and the on-the-go photo shot with a DSLR or smartphone which is unobtrusive. There’s no time to plate and consider props in the latter set up, but lighting is vital. In the dim light of a restaurant at night, use the torch function on another smartphone, diffuse it with a white napkin and hold it at a distance away. Better yet, get your dining partner to help. I prefer to be quick so as not to disturb patrons or let the food go cold.
Wipe up obvious spills, consider wood and natural textures as backgrounds, or ask the vendor or cook to hold the bowl or platter. The person who prepared the food helps to tell a story and ultimately makes it more interesting. Include the background to add context to the image. Stand-alone cappuccinos are pretty boring.
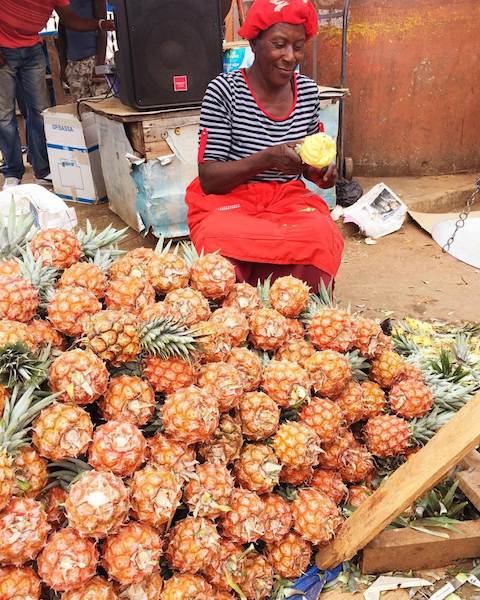
Image courtesy of @ishaygovender via Instagram
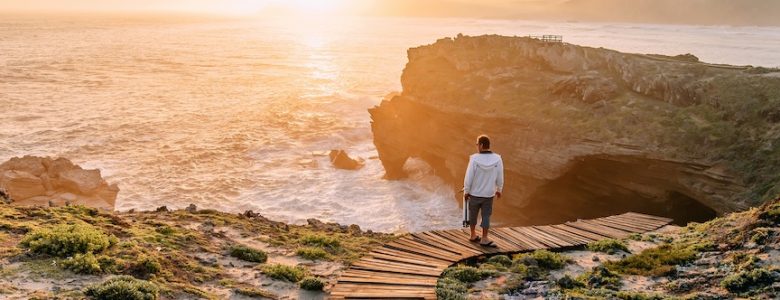
Photographer Heinrich Knoetze @instacptguy on shooting in low light
When shooting in low light it’s always best to mount you camera on a sturdy tripod, as generally you will be shooting longer exposures and the slightest movement can ruin your photograph.
If you are shooting landscapes, first turn your shutter release to timer mode, then turn on your camera’s live view. Manual focus and zoom into an object in the foreground to ensure that it is in focus. Turn live view off before you hit the shutter.
Your exposure should be correct, your aperture, shutter speed and ISO should all be considered. See how the three interact with one another if you raise the one and drop the other. I often play with adding a colour gel to a flash. This is called painting with light. It’s great fun.
When shooting portraits at night always use a flash, but experiment with taking the mounted flash off your camera and control it with a trigger. Look at how the light interacts with your subject from various angles. This is easier than it looks and practice makes perfect. It’s not necessary to have your camera on a tripod for portraiture as the flash freezes the subject, it all depends on the look you have in mind. Most importantly have fun.
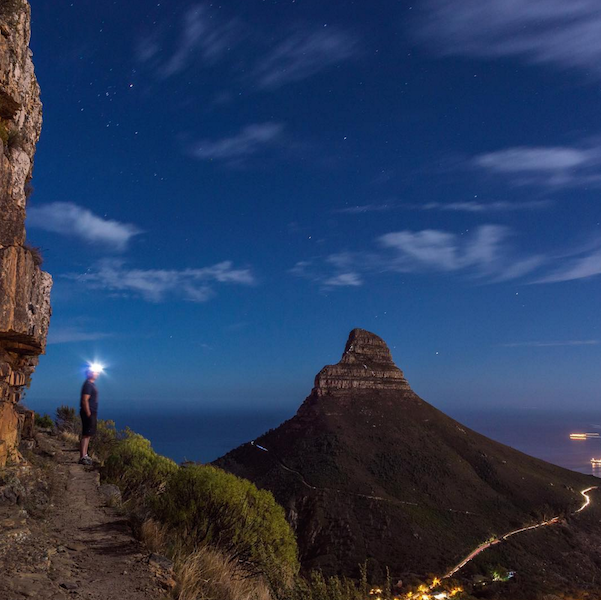
Image courtesy of @instacptguy via Instagram
Time-lapse photographer Brendon Wainwright @brendon_wainwright on Astrophotography
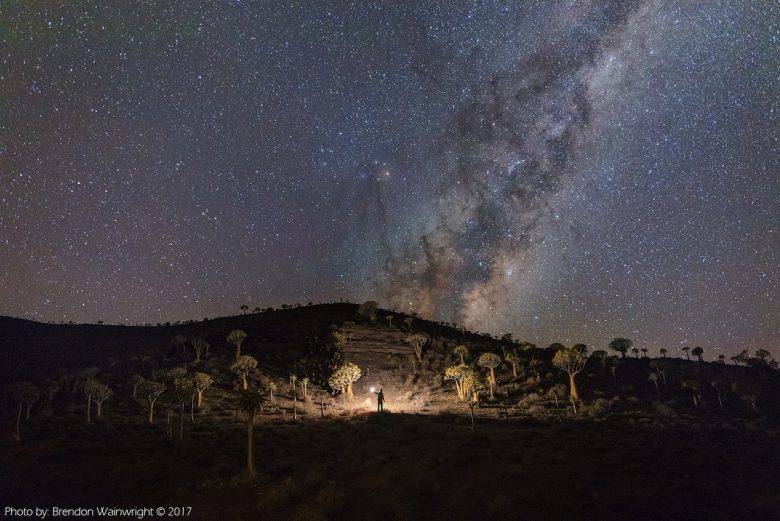
Image courtesy of @brendon_wainwright via Instagram
Astrophotography is my new favourite photography genre, there’s so much to learn about our night sky. Everything I’ve learned about how to capture the night sky, is from Tanja and Cory, when they first invited me to Sutherland for #EveryNewMoon in February 2016. Since then, each month I go somewhere dark, far away from light pollution in search of capturing the night sky.
Astrophotography tips:
- A solid and heavy tripod is crucial, you cannot afford to have a long-exposure or time-lapse being spoiled by the wind.
- A remote trigger/intervalometer is recommended.
- Always shoot in manual mode and RAW. Editing astrophotography is where your work comes alive and a JPEG just won’t cut it.
- Make sure auto-focus, Vibration Reduction or Image Stabilizer is turned off, so you can control your lens and focus manually.
- Depending on your focal length (500/400 rule) try not to shoot longer than 30 seconds to keep stars sharp, otherwise you’ll get star trails.
- Use high ISO values, an ISO of 3200 is decent enough for absorbing the light from the Milky Way. For star-trails, don’t push your ISO too high as you’ll lose the colour of each star and celestial body.
- Switch in-camera Long Exposure Noise Reduction on if you’re doing exposures longer than 30 seconds, it helps with post processing.
- I use Photopills (IOS & Android) and SkyGuide (IOS) app for all my astro/sun/moon planning.
- Lastly, go as far and dark as possible.
Photographer Sharyn Hodges @SharynHodges on apps and programmes for photo editing

Image courtesy of @SharynHodges via Instagram
After I have taken a photograph (always in RAW format) I process it in Lightroom, this programme is user friendly and allows for multiple images to be loaded and ready for the editing process. A photograph, like music, needs light and dark. In this photograph I used two “Graduated Filters”, I used one from the top to the sun, to create more light and then I used another at the bottom to remove shadows and lighten it up a bit. Once I have exported and loaded my image on my smartphone, I put it through the VSCO App to do final adjustments. This App is for free and you can download free presets or buy some at good prices. My favourite presets are 04 and A4 and E8. This is the part where I make sure my image fits and flows into my feed.
@SouthAfrica’s Instagram curator Craig Rodney @southafrica on curating an Instagram feed
Always shoot what you love. Try not let social media likes be the determinant of the photos you take. Social media followers come and go, so figure out what you love and build on that.
If you’re looking to grow a following, focus on something specific. An identifiable promise allows people to join the journey. Once you’ve built a loyal audience you can expand your style and your audience should grow with you. Once you know the journey you want to take your audience on, you will shoot what enforces it. If you’re shooting landscapes include a person in your shot. It will provide a sense of scale and will help the viewer imagine themselves being there.
Consistency is key, but it’s also a big risk. Social audiences reward consistency – if they like you sharing black and white city photos, they’ll reward those and punish colourful landscape photos. If you stick to what works for you your social media success will improve, but you’ll end up serving the social media audience, which is not good for your photography. Above all else, your primary purpose should always be to make yourself happy and share photos YOU like. Learn and experiment, be authentic, and if you’re telling a good story and sharing beautiful pictures the rest will take care of itself.